PC build calculators: PSU wattage, bottleneck & GPU fitSpecs in.Clarity out.
Power budgets. Tight clearances. Part compatibility. Work through the numbers before the build.
01 / POWER WORKBENCH
Interactive estimateSuggested PSU class
650W
465W estimated component load
25% sizing buffer · 650W profile floor. CPU and supporting-component inputs are allowances, not measurements.
Manufacturer GPU specifications · Read RTX 5070 guidance
Check the exact card, CPU limits and cables before buying.
Open the full PSU calculatorThe workbench
Check before you commit.
GPU clearance
Small case. Big card. Check the dimensions and find what still needs verifying.
Build compatibility
Work through sockets, memory, cooling, clearance and power for supported parts.
Local AI memory
Estimate model memory, context and overhead before choosing a graphics card.
Auto PC Builder · 2026 Meta
Your budget. A balanced starting point.
Five maintained tiers, selected for checked socket compatibility and sensible CPU/GPU balance. Tap a tier to see the full parts list, then verify exact components and current prices.
Understand the numbers
Build knowledge, too.
How to use the Auto PC Builder
Start with the amount you can spend on the tower, then treat the result as a complete starting configuration. Each tier reserves more of the budget for the graphics card as resolution increases, while keeping the platform, memory and power supply proportionate.
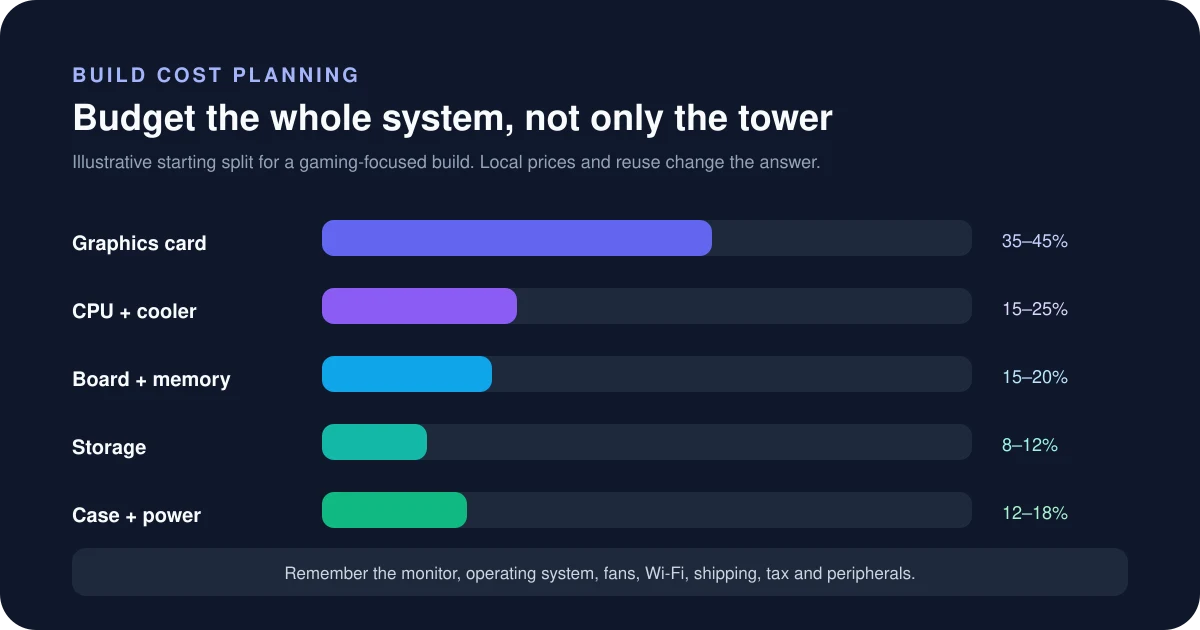
Step by step
- Choose the nearest budget tier; use the lower tier if tax, shipping and a Windows licence must fit inside the same limit.
- Read the performance target before the parts list. A 1080p esports build and a 4K visual-quality build prioritise different components.
- Open the full build page and verify motherboard socket, memory generation, case dimensions and PSU connectors.
- Compare live prices only after the configuration fits your monitor, games and upgrade plan.
How to read the result
The output is a pre-balanced editorial starting point, not a guarantee of a fixed frame rate. The performance target describes the intended class of use; individual games, settings, patches and cooling can move results up or down.
Common mistakes to avoid
- Spending the entire budget on CPU and GPU while forgetting the case, cooler, fans, licence, tax and shipping.
- Buying a high-end GPU for a low-refresh 1080p display when a monitor upgrade would improve the experience more.
- Treating a chipset name as proof of compatibility without checking the exact board revision and BIOS.
- Using a total wattage number without verifying connector type, cable count and physical PSU format.
Verify before you buy or change settings
Before buying, open the exact manufacturer pages for the CPU, motherboard, memory, case, cooler, graphics card and PSU. Confirm socket and BIOS support, RAM generation, cooler height, GPU length and thickness, PSU format and native power connectors. Prices and marketplace listings can change without notice.
Calculator logic and this guide were reviewed September 12, 2026. See the methodology and limitations.